
%27%20fill%3D%27%23E95420%27%3E%3Cpath%20d%3D%27m15.839%205.293-1.447-2.8a.136.136%200%200%200-.051-.055.144.144%200%200%200-.074-.02h-5.8a.143.143%200%200%200-.091.03.13.13%200%200%200-.034.17.138.138%200%200%200%20.072.06l7.251%202.8a.144.144%200%200%200%20.17-.054.13.13%200%200%200%20.007-.13l-.003-.001ZM11.839%204.945.073.223A.073.073%200%200%200%20.026.221a.07.07%200%200%200-.038.027.065.065%200%200%200%20.007.086l7.962%208.182a.069.069%200%200%200%20.049.022.072.072%200%200%200%20.047-.019l3.805-3.461a.066.066%200%200%200%20.02-.061.065.065%200%200%200-.014-.03.07.07%200%200%200-.028-.02l.003-.002ZM5.382%207.183a.071.071%200%200%200-.062-.022.07.07%200%200%200-.03.011.067.067%200%200%200-.023.025l-4.13%207.696a.065.065%200%200%200-.005.046.068.068%200%200%200%20.027.038.072.072%200%200%200%20.09-.006L7.13%209.18a.066.066%200%200%200%200-.087l-1.75-1.91Z%27%2F%3E%3C%2Fg%3E%3Cdefs%3E%3CclipPath%20id%3D%27a%27%3E%3Cpath%20fill%3D%27%23fff%27%20d%3D%27M0%200h15.83v15.21H0z%27%2F%3E%3C%2FclipPath%3E%3C%2Fdefs%3E%3C%2Fsvg%3E)

%27%20fill%3D%27%23E95420%27%3E%3Cpath%20d%3D%27M1.936%202.592c.668%200%201.21-.515%201.21-1.151S2.604.29%201.936.29C1.267.29.726.805.726%201.44c0%20.637.541%201.152%201.21%201.152ZM14.56.576H3.404a1.587%201.587%200%200%201%20.024%201.69l-.026.04h11.156a.56.56%200%200%200%20.386-.15.518.518%200%200%200%20.16-.369v-.692a.502.502%200%200%200-.16-.369.543.543%200%200%200-.386-.15ZM1.936%206.701c.668%200%201.21-.515%201.21-1.15%200-.637-.542-1.152-1.21-1.152-.669%200-1.21.515-1.21%201.151s.541%201.151%201.21%201.151ZM14.56%204.685H3.404a1.612%201.612%200%200%201%20.242%201.083c-.03.215-.105.421-.219.608l-.026.04h11.157a.56.56%200%200%200%20.386-.15.518.518%200%200%200%20.16-.37v-.692a.5.5%200%200%200-.16-.369.542.542%200%200%200-.386-.15ZM1.936%2010.81c.668%200%201.21-.515%201.21-1.15%200-.637-.542-1.152-1.21-1.152-.669%200-1.21.515-1.21%201.151s.541%201.151%201.21%201.151ZM14.56%208.795H3.404a1.611%201.611%200%200%201%20.243%201.082%201.581%201.581%200%200%201-.245.648h11.156a.559.559%200%200%200%20.386-.15.517.517%200%200%200%20.16-.37v-.692a.502.502%200%200%200-.16-.368.543.543%200%200%200-.386-.15ZM1.936%2014.92c.668%200%201.21-.515%201.21-1.15%200-.637-.542-1.152-1.21-1.152-.669%200-1.21.515-1.21%201.151s.541%201.151%201.21%201.151ZM14.56%2012.904H3.404a1.611%201.611%200%200%201%20.242%201.082%201.58%201.58%200%200%201-.219.608l-.026.04h11.157a.562.562%200%200%200%20.386-.15.517.517%200%200%200%20.16-.37v-.692a.5.5%200%200%200-.16-.369.543.543%200%200%200-.386-.15Z%27%2F%3E%3C%2Fg%3E%3Cdefs%3E%3CclipPath%20id%3D%27a%27%3E%3Cpath%20fill%3D%27%23fff%27%20d%3D%27M0%200h15.83v15.21H0z%27%2F%3E%3C%2FclipPath%3E%3C%2Fdefs%3E%3C%2Fsvg%3E)
%27%20fill%3D%27%23E95420%27%3E%3Cpath%20d%3D%27M9.618.272c-.634%200-1.243.243-1.691.674-.448.43-.7%201.015-.701%201.624v4.221a1.9%201.9%200%200%201%201.362%200v-4.22a.955.955%200%200%201%20.291-.72%201.067%201.067%200%200%201%201.479%200%20.955.955%200%200%201%20.29.719v.962h1.363V2.57c0-.61-.253-1.194-.702-1.625A2.445%202.445%200%200%200%209.618.272ZM9.017%208.433c0%20.21-.065.417-.187.593a1.102%201.102%200%200%201-.499.393c-.203.08-.426.102-.642.06a1.125%201.125%200%200%201-.568-.292%201.055%201.055%200%200%201-.304-.547%201.028%201.028%200%200%201%20.064-.616c.084-.195.226-.362.41-.479a1.143%201.143%200%200%201%201.401.133c.103.1.185.217.24.347.057.129.085.268.085.408ZM2.773%205.855c-.634.001-1.242.244-1.69.674C.633%206.96.381%207.545.38%208.154v4.082a1.901%201.901%200%200%201%201.363%200V8.154a.955.955%200%200%201%20.29-.719%201.067%201.067%200%200%201%201.479%200%20.955.955%200%200%201%20.29.719v.962h1.363v-.962c0-.61-.253-1.194-.702-1.625a2.444%202.444%200%200%200-1.69-.674ZM2.166%2013.878c0%20.21-.065.415-.186.59-.121.174-.294.31-.496.39-.202.08-.424.102-.638.06a1.119%201.119%200%200%201-.565-.29%201.049%201.049%200%200%201-.302-.543c-.043-.206-.02-.42.063-.614.084-.194.225-.36.407-.476a1.136%201.136%200%200%201%201.394.133%201.024%201.024%200%200%201%20.323.75Z%27%2F%3E%3Cpath%20d%3D%27M14.752%204.76a1.789%201.789%200%200%201-.681-.126v2.411a.972.972%200%200%201-.312.682c-.193.179-.45.28-.718.28-.268%200-.526-.101-.718-.28a.972.972%200%200%201-.312-.682V4.32h-1.363v2.726c0%20.61.252%201.195.7%201.626a2.443%202.443%200%200%200%201.692.673c.635%200%201.244-.242%201.692-.673.449-.431.7-1.016.7-1.626v-2.41a1.9%201.9%200%200%201-.68.125ZM15.858%202.822c.037.225%200%20.455-.107.658a1.1%201.1%200%200%201-.49.472%201.161%201.161%200%200%201-1.302-.198%201.04%201.04%200%200%201-.206-1.251%201.1%201.1%200%200%201%20.492-.47%201.161%201.161%200%200%201%201.299.199c.166.16.276.366.314.59ZM7.907%2010.2c-.233%200-.465-.042-.681-.126V12.6a.97.97%200%200%201-.302.7%201.05%201.05%200%200%201-.728.29%201.05%201.05%200%200%201-.728-.29.97.97%200%200%201-.302-.7V9.845H3.804V12.6c0%20.61.252%201.194.7%201.625a2.443%202.443%200%200%200%201.692.674c.634%200%201.243-.243%201.692-.674.448-.43.7-1.015.7-1.625v-2.526a1.887%201.887%200%200%201-.68.127Z%27%2F%3E%3C%2Fg%3E%3Cdefs%3E%3CclipPath%20id%3D%27a%27%3E%3Cpath%20fill%3D%27%23fff%27%20d%3D%27M0%200h15.83v15.21H0z%27%2F%3E%3C%2FclipPath%3E%3C%2Fdefs%3E%3C%2Fsvg%3E)

How to upgrade from Ubuntu 18.04 LTS to 20.04 LTS today

Igor Ljubuncic
on 4 May 2020
Tags: 18.04 LTS , 20.04 LTS , Beaver , Bionic , Focal , Fossa , LTS , Ubuntu , Ubuntu 18.04 , Ubuntu 20.04
Ubuntu 20.04 LTS (Focal Fossa) was officially released on April 23. This is the latest Ubuntu Long Term Support (LTS) release, with security patches and updates available until 2025. If you are currently using an older version of Ubuntu, you may be interested in upgrading.
In this tutorial, we will show how to safely upgrade from Ubuntu 18.04 LTS (Bionic Beaver), the previous LTS, to the current one. We will explain several methods by which you can achieve this, including some advanced tips and tricks that can help you further customise your upgrade process.
Before you upgrade…
There are several things you need to take into account before you go forward with the upgrade:
- The upgrade process can be done using the Ubuntu update manager or on the command line. The Ubuntu update manager will start showing a prompt for an upgrade to 20.04 once the first dot release of Ubuntu 20.04 LTS (i.e. 20.04.1) is released. The typical timeframe for this is around three months after the official release.
Once this functionality is enabled, you will see a prompt like this one:
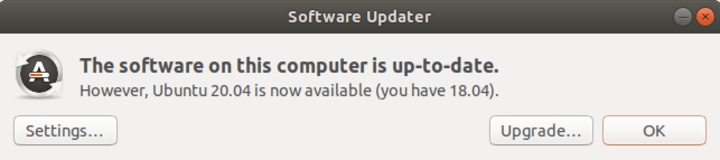
You can still do an upgrade right now, though. However, the process at the moment involves some use of the command line, and therefore requires some level of technical knowledge and confidence. If you are not sure about any of the steps or methods outlined below, you might want to wait for the dot release.
- If you do want to proceed with the upgrade, you can launch the graphical guided wizard from the command line, or complete the entire process using the latter. In this tutorial, we will demonstrate both options.
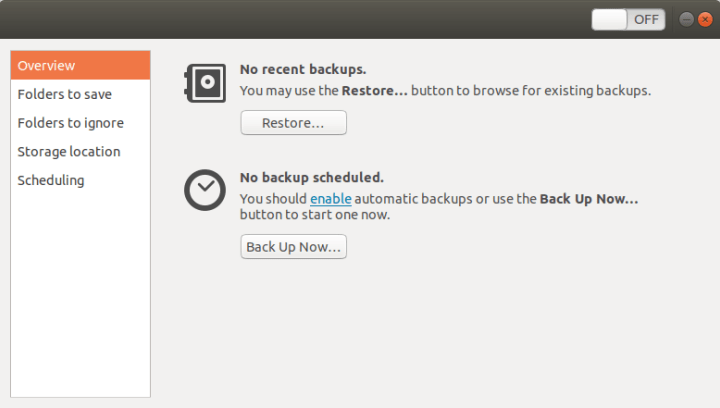
- Please make sure to back up your data. Upgrades are normally safe, but there is always a chance something may go wrong. It is crucial that you have your personal files safely copied to a backup location, so you can restore them if there are any problems or complications. There are several ways you can do this:
- Ubuntu has its own backup tool, which you can turn on.
- You can also manually copy important files to a different device (second hard disk, USB drive, another computer on the network, etc). You can copy the files manually or use a data backup/replication tool. Good examples for simple, friendly tools of this nature are Timeshift and Grsync. On the command-line, you can use tar or rsync.
- You can also create a full system image of your Ubuntu installation with a dedicated system imaging software like CloneZilla.
- If you want to double-check everything works well on your hardware, you can download the Ubuntu 20.04 LTS ISO image, copy it to a USB drive using a live media creation tool like Ubootnetin, and then start your computer in an Ubuntu 20.04 LTS live session.
- Please make sure your computer has sufficient free disk space. By default, for the best experience, you should have 25 GB of free space for a new installation of Ubuntu. With version upgrades, you can get by with less free disk space, but the process could take longer.
- The upgrade process can take some time. You should not interrupt or cancel the process, as it may leave the system in an unstable state. If you are using a battery-powered device, like a laptop, it is advisable to use the charger.
Upgrade to 20.04 LTS – using a graphical guided wizard
As we mentioned earlier, the Ubuntu update manager will start showing upgrade notifications to users roughly three months after the official release. However, it is possible to upgrade Ubuntu 18.04 LTS without having to wait.
This entails running a command in a terminal window, which will then launch the graphical guided wizard.
If you are not comfortable with this path, it is best to continue running Ubuntu 18.04 LTS until the availability of the upgrade offer through the update manager. The sequence of actions below requires some familiarity with the command-line usage, so it’s best suited for people like developers, administrators or more skilled techies.
The command to start is do-release-upgrade, executed with specific options.
To better understand what we are going to do, you can check what options are available in the do-release-update tool by running the command with the -h flag:
sudo do-release-upgrade -h
Usage: do-release-upgrade [options]
Options:
  -h, --help    show this help message and exit
  -V, --version Show version and exit
  -d, --devel-release
                If using the latest supported release, upgrade to
                the development release
  --data-dir=DATA_DIR
                Directory that contains the data files
  -p, --proposed
                Try upgrading to the latest release using the
                upgrader from $distro-proposed
  -m MODE, --mode=MODE
                Run in a special upgrade mode. Currently
                'desktop' for regular upgrades of a desktop
                system and 'server' for server systems are
                supported.
  -f FRONTEND, --frontend=FRONTEND
                Run the specified frontend
  -c, --check-dist-upgrade-only
                Check only if a new distribution release is
                available and report the result via the exit code
  --allow-third-party Try the upgrade with third party mirrors and
                repositories enabled instead of commenting them
                out.
  -q, --quiet
Specifically, the important options are:
- -d – this allows us to upgrade to 20.04; normally, this option is used by early testers to try development versions of Ubuntu ahead of their official release. We will use it to start the upgrade. While the labels say “development”, don’t worry – we will in fact be upgrading to the stable, official release of Ubuntu 20.04 LTS.
- -f – this option will launch a graphical guided wizard. Without it, the do-release-upgrade tool will run in the command-line. The process is otherwise identical.
Another useful option is –allow-third-party. We will talk about it a bit more in the section titled ‘Advanced options & third-party software’. If your Ubuntu setup includes applications from sources other than the standard Ubuntu repository archives, you may want to include this option to preserve and carry over your third-party applications.
Therefore, to start the upgrade to Ubuntu 20.04 LTS using a GUI tool, the full command we need is then:
sudo do-release-upgrade -d -f DistUpgradeViewGtk3
This will launch the upgrade process using a Gtk3-based GUI.
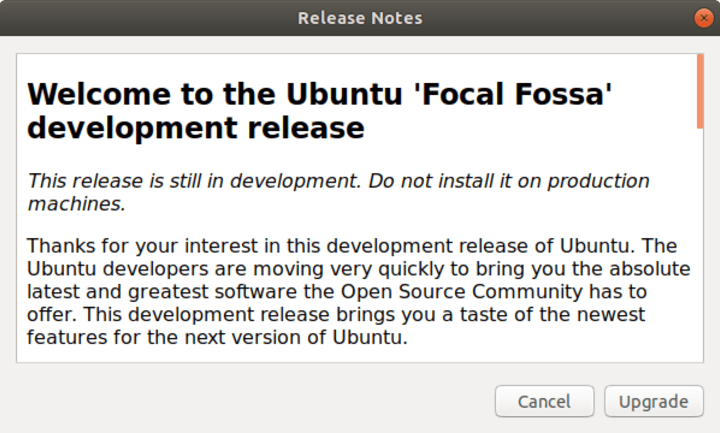
The wizard will ask you several questions, and run through several steps:
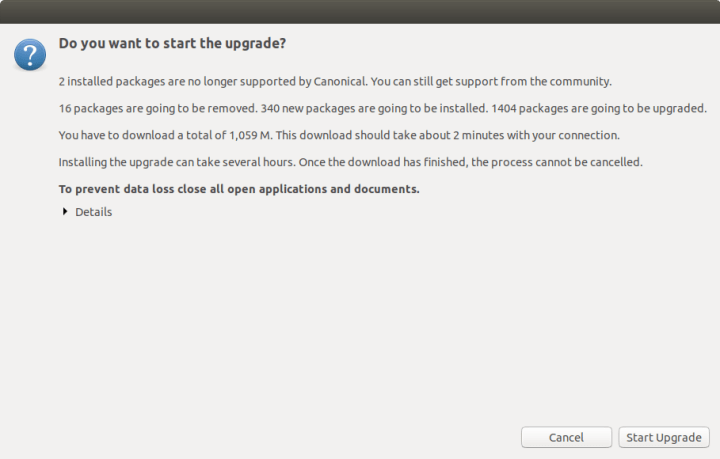
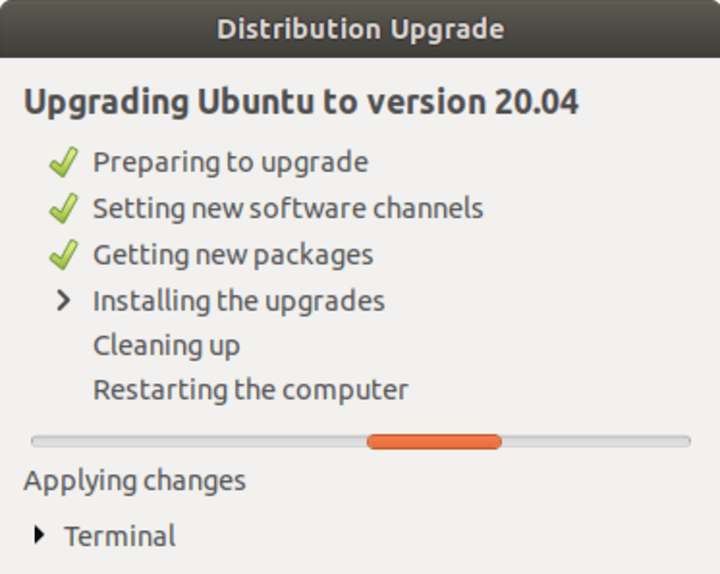
You may be asked one or two questions during the upgrade, specifically if you want to retain existing settings for certain system files (like timezone configuration). If you are not sure, you can safely proceed with the default answer.
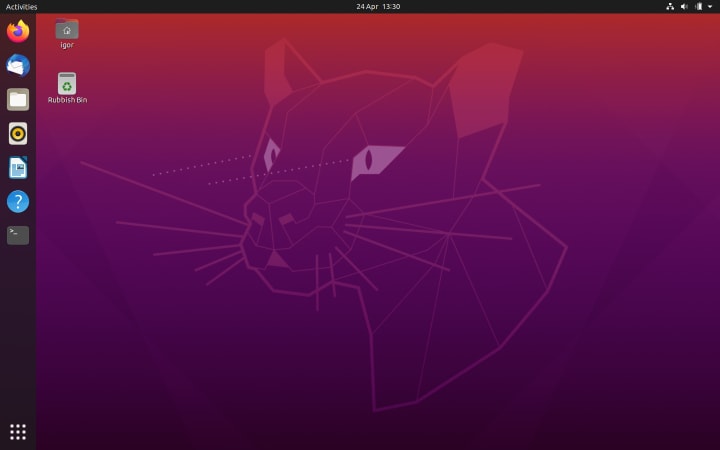
After a while, the upgrade should complete, and you should see yourself logged into the 20.04 desktop!

Advanced options & third-party software
For most users, the flow described above will be sufficient. However, you can further customise it, which is particularly useful for those using third-party software that is installed from software channels outside the standard Ubuntu archives. For instance, if you’ve installed the Google Chrome, Skype or VirtualBox software manually, the updates for these applications are provided through separate repositories.
By default, non-Ubuntu software channels will be disabled during the upgrade. You will need to manually enable them after the upgrade is completely. Alternatively, you can instruct the upgrade tool to allow these additional packages.
This can be done by running do-release-upgrade with the –allow-third-party flag, as mentioned earlier.
Alternative options to upgrade
You can start the graphical guided wizard upgrade process in several other ways.
On the command line, you can run update-manager -c to initiate the upgrade. Like the do-release-update tool, you can run the above with the optional -d flag to get the “development” release ahead of the 20.04.1 availability.
sudo update-manager -c
sudo update-manager -c -d
On the command line, you can also run /usr/lib/ubuntu-release-upgrader/check-new-release-gtk.
sudo /usr/lib/ubuntu-release-upgrader/check-new-release-gtk
In general, you can control what Ubuntu release upgrades are available, regardless of which tool you use and run. This can be done by editing the following configuration file:
/etc/update-manager/release-upgrades
Here, you can check the line Prompt=XXXX, whereby:
- never – no upgrades will be offered.
- normal – supported release that immediately succeeds the currently running release will be offered.
- lts – LTS releases will be offered.
Upgrade to 20.04 LTS – on the command line
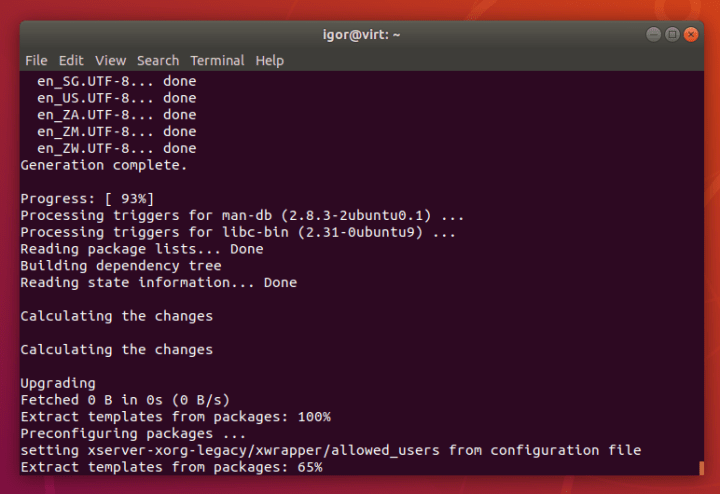
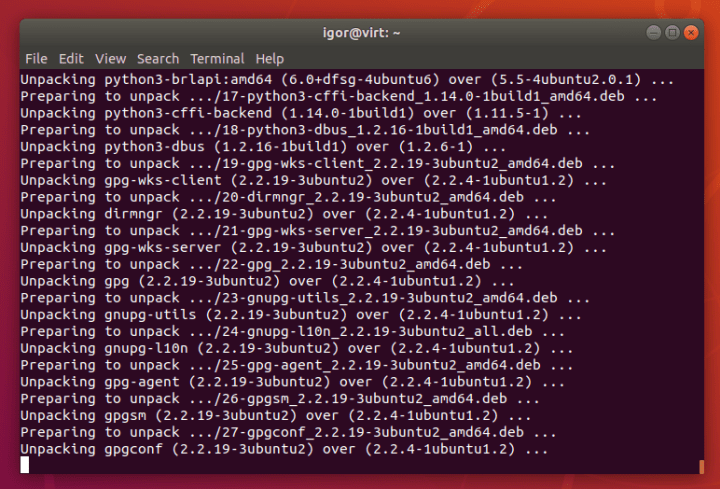
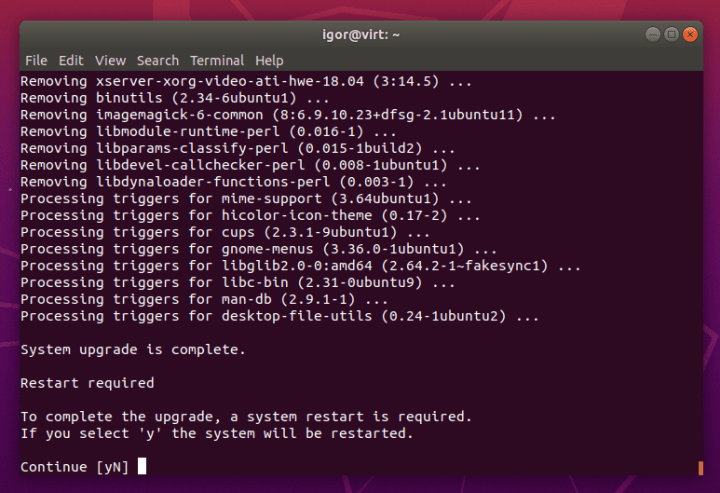
The upgrade process on the command-line is very similar to what we have already done. The only difference is no GUI will be launched and you will be asked Y/N questions in the terminal window.
sudo do-release-upgrade -d


Once complete, you will be logged into the 20.04 desktop:
Summary
In this guide, we laid out several methods for upgrading from Ubuntu 18.04 LTS to 20.04 LTS. These include both visual tools, i.e. graphical wizards, and command-line utilities, which are often best suited for more skilled users. The Ubuntu update manager will start prompting users in about three months, but if you want to upgrade your system now, we also outlined the steps you will need to get underway.
If you are still undecided about the upgrade, and would like to learn more, you may want to sign up for a webinar highlighting the new features and technologies available in Ubuntu 20.04.
We hope you will find this tutorial valuable and useful, and we hope you enjoy your new desktop experience.
Stay secure and supported with the Ubuntu Pro subscription.
Talk to us today
Interested in running Ubuntu in your organisation?