
Home Assistant tutorial on Ubuntu Core

Nathan Hart
on 13 September 2022
Tags: smart home
Install Home Assistant and create a motion-activated light automation with this tutorial
| Key | Value |
|---|---|
| Summary | Install Home Assistant and create an automation |
| Categories | Smart Home, Ubuntu Core |
| Difficulty | 3 |
| Author | nathan.hart@canonical.com |
Overview
In this tutorial, we’ll learn how to install Home Assistant on Ubuntu Core, then create a motion-activated light automation. This is a great starting point for a secure, open-source smart home. By the end, we’ll have learned the skills we need to create Home Assistant automations of our own with whatever smart home devices we wish.
Materials required:
- Raspberry Pi 4
- Power cable
- Case (recommended)
- SD card (at least 8GB recommended)
- SD card reader (if not built into your computer)
- Aeotec Z-Stick Gen 5+ Z-Wave USB stick
- Aeotec MultiSensor 6
- Aeotec LED Bulb 6 Multi-white
- A monitor with an HDMI interface
- A mini-HDMI cable
- A USB keyboard
- A USB power adapter

Installing Ubuntu Core
Duration: 20 minutes
We’ll start by following the instructions here to install Ubuntu Core on our raspberry pi, making note of its IP address during the process.
Pairing the Z-Wave devices
Duration: 3 minutes
We can pair the bulb and multi-sensor to the Z-Wave stick without installing any software. The Z-Wave stick has a battery in it, so it doesn’t even need to be plugged in!
First, we’ll install the bulb in a light fixture, switched off. After pressing the button on the Z-Wave stick, we should see blue light flashing around the button. Now, we’ll switch on the bulb that will flash a few times to indicate it is searching for a Z-Wave host with which to pair. The two should automatically detect each other and pair.
Now, we’ll plug in the USB power cable included with the multi-sensor into the sensor and our USB power adapter. We’ll press the button on the Z-Wave stick again and confirm that we see the flashing blue light. There is a “tamper button” on a corner of the rear panel of the multi-sensor. We’ll press the tamper button, and the multi-sensor should pair with the Z-Wave stick automatically.
Installing the Home Assistant snap
Duration: 4 minutes
We can connect to the raspberry pi via ssh by opening a terminal on our computer and running the command:
ssh @
Now, we’ll run the command:
snap install home-assistant-snap
This will install the latest version of the Home Assistant snap from the stable channel

To support the Z-Wave stick, we will need to install a Z-Wave server as well, fortunately, there is a snap for it!
We’ll run the command snap install zwavejs2mqtt, followed by
- snap connect zwavejs2mqtt:raw-usb
- snap connect zwavejs2mqtt:hardware-observe
These commands will give the Z-Wave server access to the USB port so it can talk to the Z-Wave stick. For further information, refer to the documentation here.

Linking Home Assistant and the Z-Wave server
Duration: 3 minutes
We’ll now start the Z-Wave service/daemon by running the command sudo zwavejs2mqtt.enable
Now, in a browser window, we can type in the IP address of the pi, followed by the Z-Wave server port number like this http://:8091
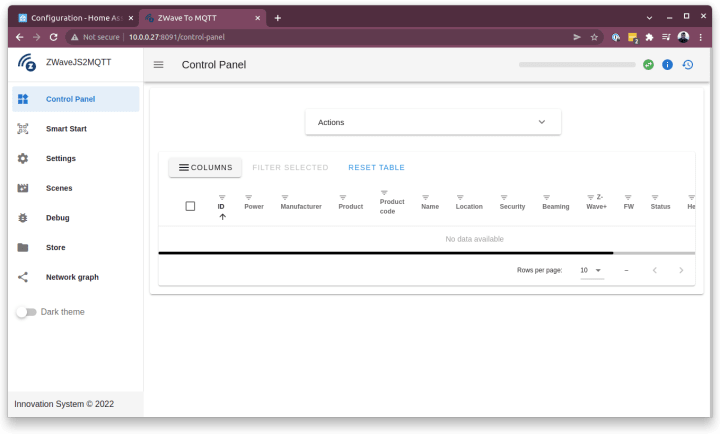
Now, we’ll click on settings and scroll to the Home Assistant section where we’ll enable WS server.

Press SAVE, and we’ll then move to the Z-Wave section of the Settings page. There, we’ll disable the soft reset setting. This is necessary for the particular type of Z-Wave dongle we are using. Ensure as well that the serial port is listed as shown in the screenshot below.

Now, let’s configure Home Assistant. To do this, we’ll open a new browser tab and type the IP address of the Pi and port 8123 like this http://:8123
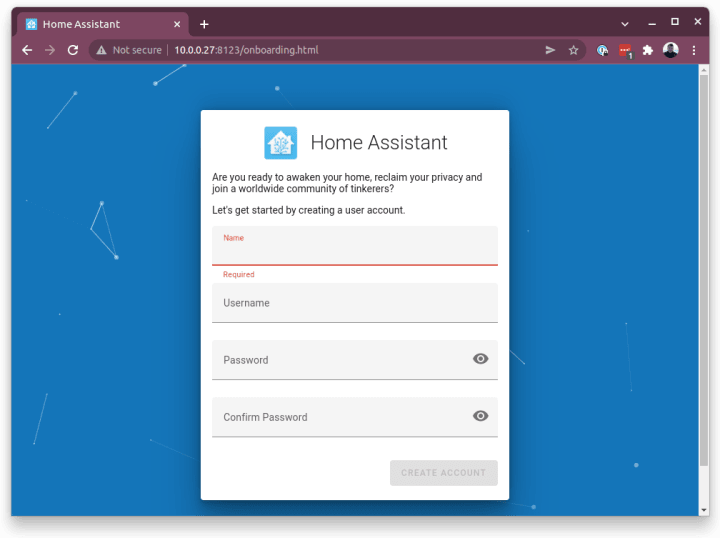
The UI will prompt us to set our home location, units of choice, and usage metrics preferences. It also may discover some services on your local network to connect.
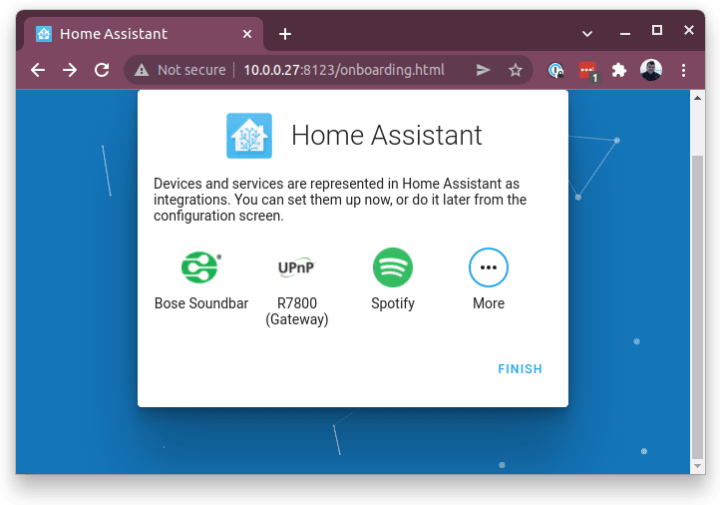
We’ll skip these for now, and click FINISH.
We should now be able to see the Home Assistant home page. From here, we’ll click Configuration in the left menu, then Devices & Services.

In the Integrations tab, we’ll now click on ADD INTEGRATION.

In the New Integration interface, search for and click on Z-Wave JS, taking care to not use the deprecated Z-Wave integration.

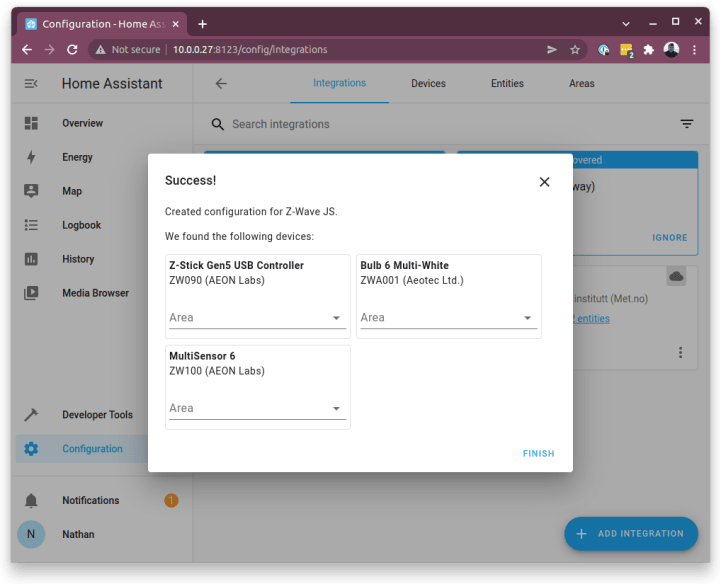
The URL field should be populated automatically, but if not, type in ws://localhost:3000. This comes from the previous setup we did in the Z-Wave server.

We should now see the devices we previously paired to our Z-Wave stick! Set the area fields appropriately. For me, I put Office in the Area field, as I am creating my motion-activated light in my office.
Creating the automation in Home Assistant
Duration: 4 minutes
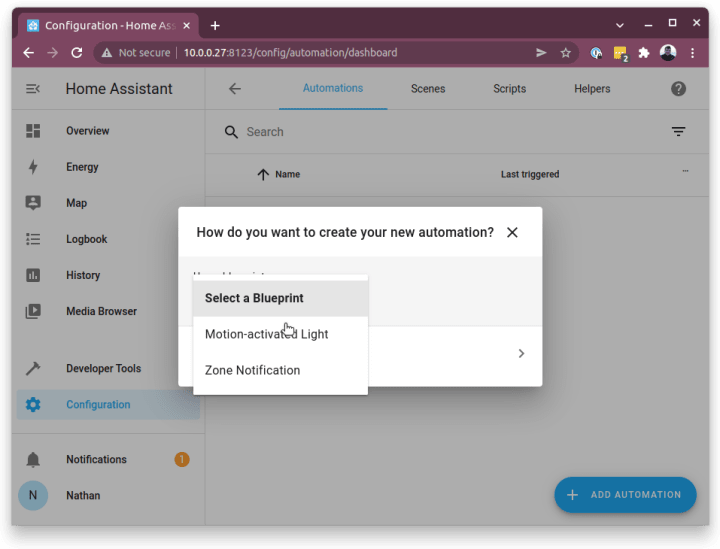
From the Home Assistant homepage, we’ll now go to Configuration -> Automations & Scenes -> Add Automation. In the pop-up window, choose Select a Blueprint and pick Motion-activated Light from the dropdown.
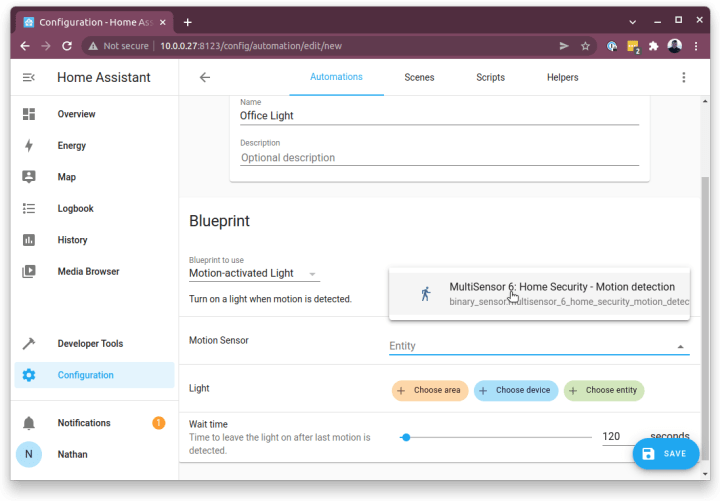
We need to choose a name for the automation, something like Office Light should suffice. In the Motion Sensor dropdown, we should select our multi-sensor, which should appear automatically.
In the Light section, we’ll select Choose device and select our light bulb from the dropdown.
We’ll now set the wait time to how long the light should remain on with no motion detected, 120 seconds in my case.
Now, we’ll click SAVE and we’re done!
For ideas on what to try next, check out the community forums at Home Assistant, and let us know what you were able to create on Ubuntu Core in our discourse community.
Talk to us today
Interested in running Ubuntu in your organisation?
Newsletter signup
Related posts
A look into Ubuntu Core 24: Your first Linux-powered Matter device
Welcome to this blog series which explores innovative uses of Ubuntu Core. Throughout this series, Canonical’s Engineers will show what you can build with...
An introduction to smart home business models
Smart homes are changing. A modern smart home typically isn’t a self-contained, set-it-and-forget-it, custom installation. It’s a hyper-connected set of...
Matter on Ubuntu: getting started with the standard for smart home devices
Canonical joined the Connectivity Standards Alliance last year to lead the charge for Linux in the smart home. The Matter standard is a particular focus for...