

dannf
on 26 February 2018
This article originally appeared on Dann Frazier's blog
At Canonical, we’ve been doing work to make sure Ubuntu OpenStack deploys on ARM servers as easily as on x86. Whether you have Qualcomm 2400 REP boards, Cavium ThunderX boards, HiSilicon D05 boards, or other Ubuntu Certified server hardware, you can go from bare metal to a working OpenStack in minutes!
The following tutorial will walk you through building a simple Ubuntu OpenStack setup, highlighting any ARM-specific caveats along the way.
Note: very little here is actually ARM specific – you could just as easily follow this to setup an x86 OpenStack.
Juju and MAAS
Ubuntu OpenStack is deployed using MAAS and Juju. If you’re unfamiliar with these tools, let me give you a quick overview.
MAAS is a service that manages clusters of bare-metal servers in a manner similar to cloud instances. Using the web interface, or its API, you can ask MAAS to power on one or more servers and deploy an OS to them, ready for login. In this tutorial, we’ll be adding your ARM servers to a MAAS cluster, so that Juju can deploy and manage them via the MAAS API.
Juju is a workload orchestration tool. It takes definitions of workloads, called bundles, and realizes them in a given cloud environment. In this case, we’ll be deploying Ubuntu’s openstack-base bundle to your MAAS cloud environment.
Hardware Requirements
A minimal Ubuntu OpenStack setup on ARM comprises:
- 5 ARM server nodes for your MAAS cluster. 4 of these will be used to run OpenStack services, the 5th will operate a Juju controller that manages the deployment.
- Each system needs to have 2 disks (the second is for ceph storage).
- Each system needs to have 2 network adapters. To keep this simple, it’s best if the network adapters are identically configured (same NICs, and if plug-in NICs are used, same slots).
- Each node should be configured to PXE boot by default. If you have one of these systems, checkout the “MAAS Notes” section on the Ubuntu wiki for tips:
- 1 server to run the MAAS server
- CPU architecture doesn’t matter.
- Install this server with Ubuntu Server 16.04. A clean “Basic” installation is recommended.
- >= 10GB of free disk space.
- >= 2GB of RAM
- 1 client system for you to use to execute juju and openstack client commands to initiate, monitor and test out the deployment.
- Make sure this is a system that can run a web browser, so you can use it to view the Juju, MAAS and OpenStack GUIs.
- Ubuntu 16.04 is recommended (that’s what we tested with).
Network Layout
Again for simplicity, this tutorial will assume that everything (both NICs of each ARM server, ARM server BMCs, MAAS server, client system and your OpenStack floating IPs) are all on the same flat network (you’ll want more segregation in a production deployment). Cabling should look like the following figure:
 We’re using a 10.228.66.0/24 network throughout this tutorial. MAAS will provide a DHCP server for this subnet, so be sure to deactivate any other DHCP servers to avoid interference.
Network Planning
Since all of your IPs will be sharing a single subnet, you should prepare a plan in advance for how you want to split up the IPs to avoid accidental overlap. For example, with our 10.228.66.0/24 network, you might allocate:
- 10.228.66.1 – Gateway
- 10.228.66.2:10.228.66.20 – Static IPs (MAAS Server, client system, ARM Server BMCs, etc.)
- 10.228.66.21:10.228.66.50: MAAS node IP pool (IPs MAAS is allowed to assign to your ARM Server nodes).
- 10.228.66.51:10.228.66.254: OpenStack floating IP pool (for your OpenStack instances)
OK. Let’s get to it.
MAAS Server Installation
On the MAAS Server, run the following command sequence to install the latest version of MAAS:
sudo apt-add-repository ppa:maas/stable -y
sudo apt update
sudo apt install maas -y
Once MAAS is installed, run the following command to setup admin username and password:
ubuntu@maas:~$ sudo maas createadmin
Username: ubuntu
Password:
Again:
Email: ubuntu@example.org
Import SSH keys [] (lp:user-id or gh:user-id): lp:<lpuserid>
Using a web browser from the client system, connect to the MAAS web interface. It is at http://<MAAS Server IP addr>/MAAS :

Login with the admin credentials you just created. Select arm64 in Architectures of image sources and click “Update Selection”. Wait for image download and sync. After all images are synced, Click “Continue”.

Import one or more ssh keys. You can paste them in, or easily import from Launchpad or GitHub:

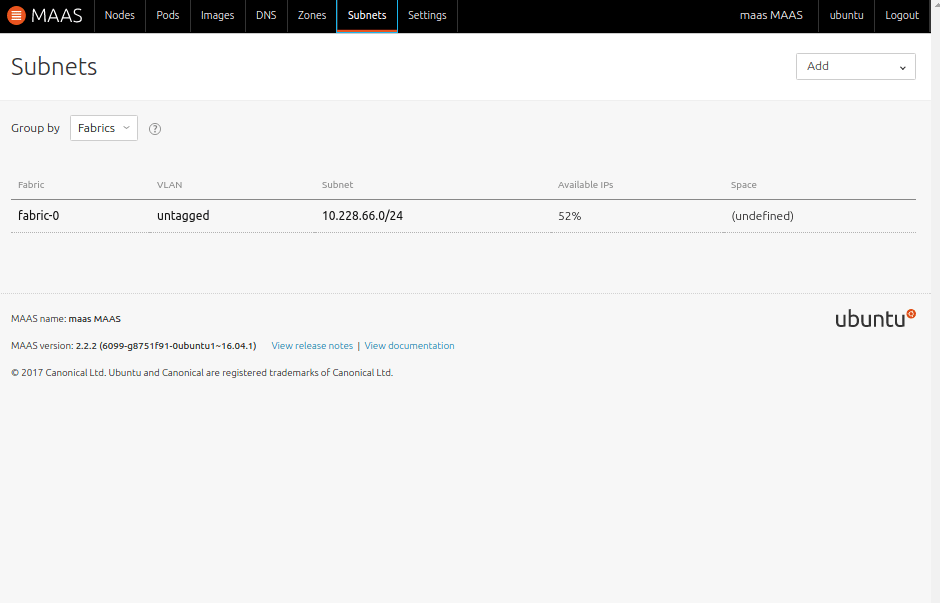
After basic setup, Goto “Subnets” tag, and click the subnet address:
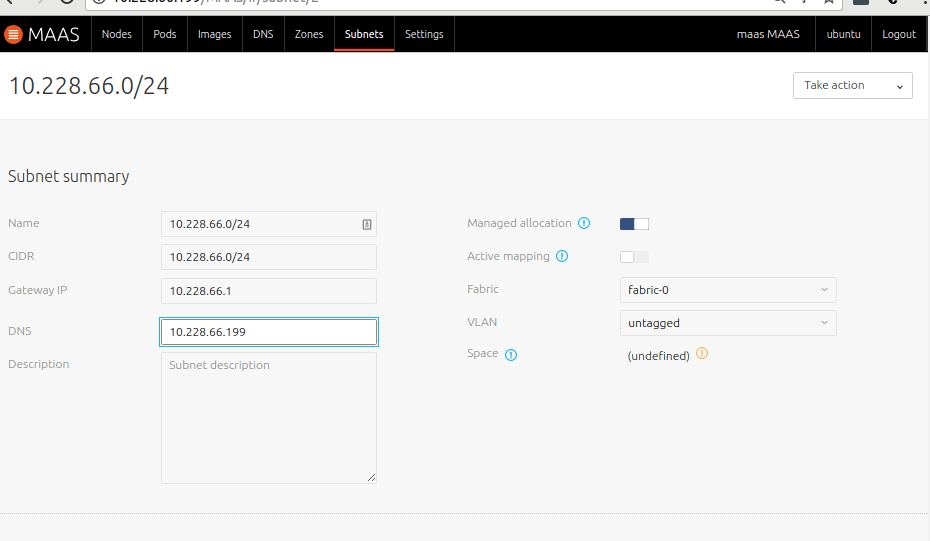
Provide the correct “Gateway IP” and “DNS” address for your subnet:
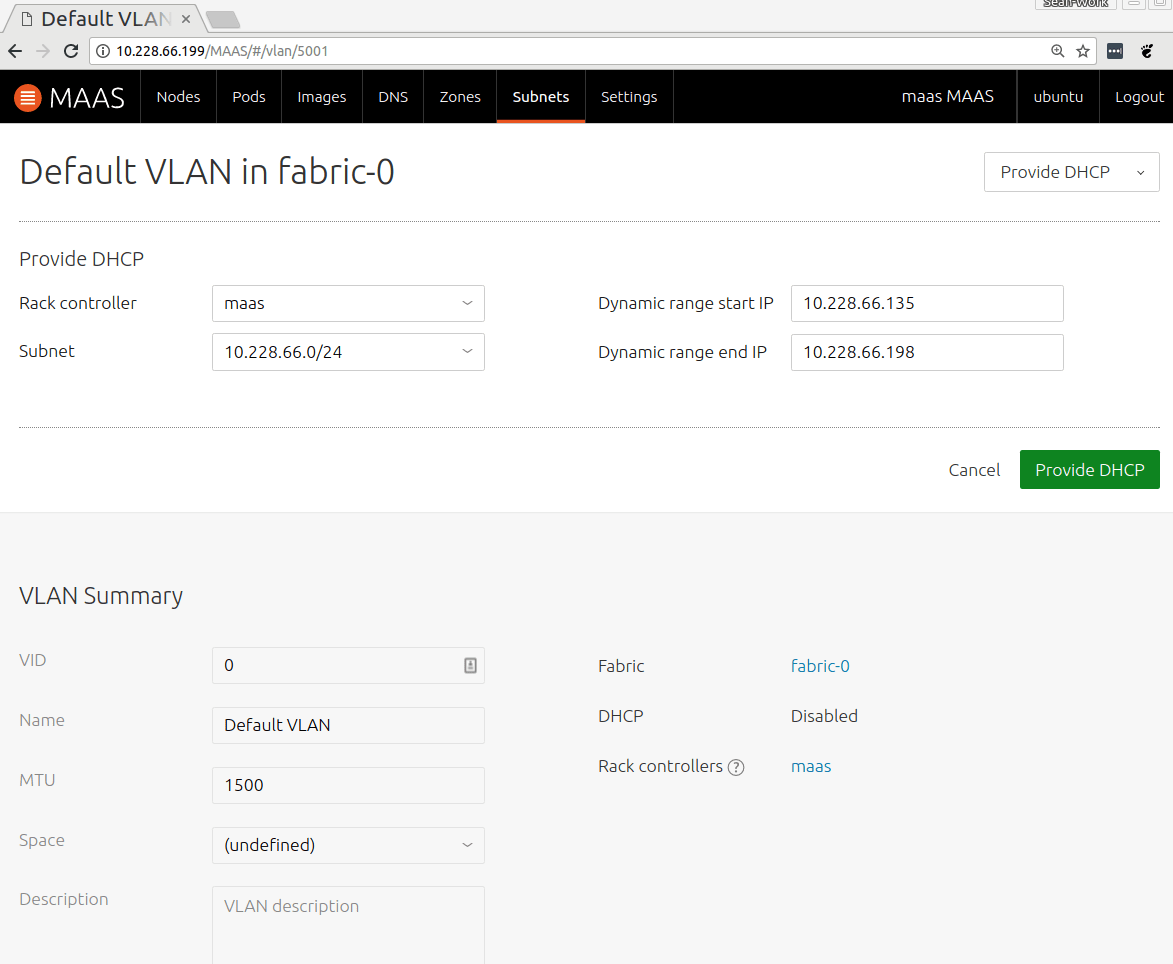
Next, goto “Subnets” tag and click untagged VLAN:

Select “Provide dhcp” in the “Take action” pulldown:
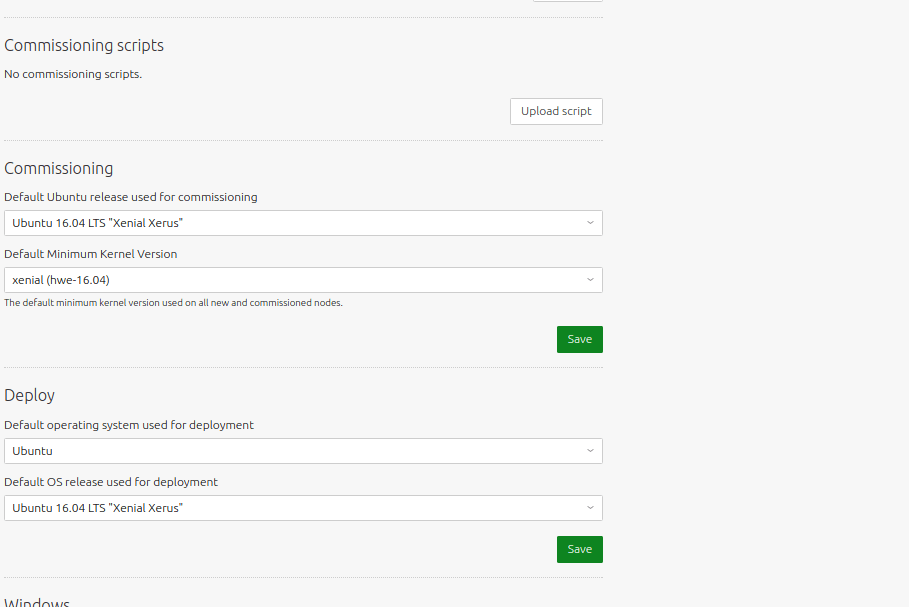
Many ARM servers (other than X-Gene/X-Gene 2 systems and Cavium ThunderX CRBs) require the 16.04 HWE kernel, so we need to configure MAAS to use it by default. Go to the “Settings” tab and select “xenial (hwe-16.04)” as the Default Minimum Kernel Version for Commissioning, then click “Save”:
Enlisting and Commissioning Nodes
In order for MAAS to manage your ARM Server nodes, they need to be first enlisted into MAAS, then commissioned. To do so, power on the node, and allow it to PXE boot from the MAAS server. This should cause the node to appear with a randomly generated name on the “Nodes” page:
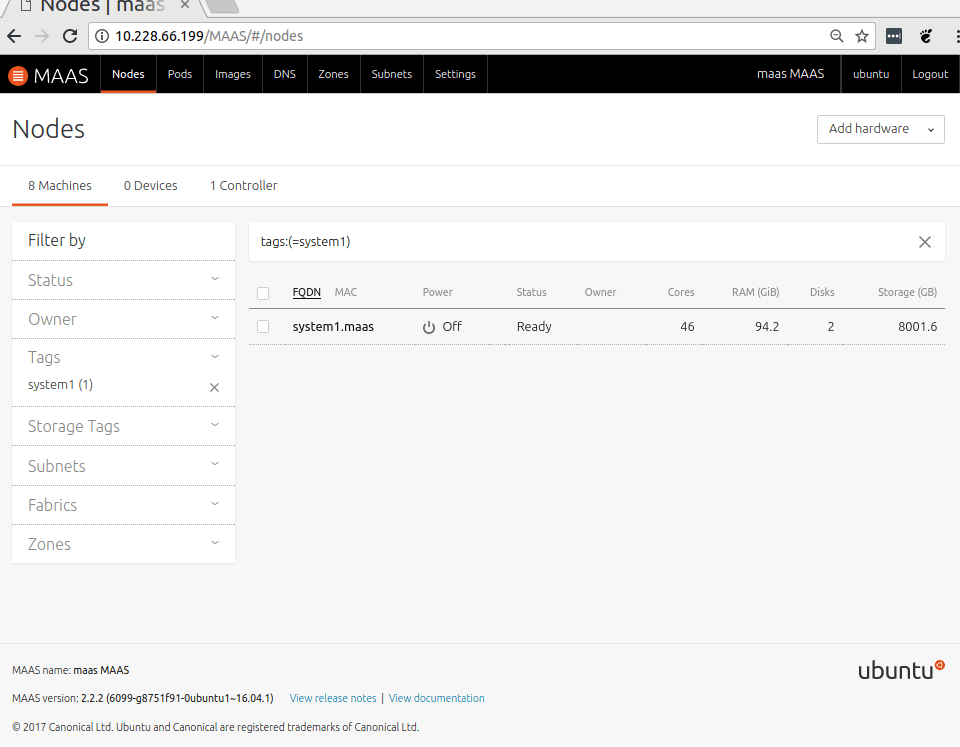
Click on the Node name, and select “Commission” in the “Take action” menu. This will begin a system inventory process after which the node’s status will become “Ready”. Repeat for all other nodes.
Testing out MAAS
Before we deploy OpenStack, it’d be good to first demonstrate that your MAAS cluster is functioning properly. From the “Nodes” page in the MAAS UI, select a node and choose the “Deploy” action in the “Take action” pulldown:

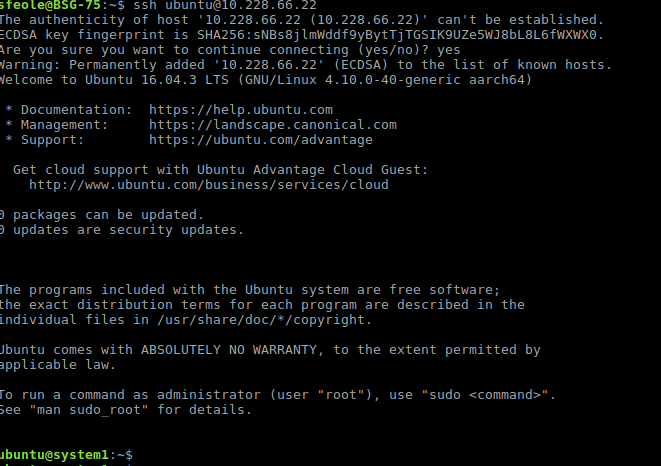
When status becomes “Deployed”, you can ssh into the node with username “ubuntu” and your ssh private key. You can find a node’s IP address by clicking the node’s hostname and looking at the Interfaces tab:

Now ssh to that node with username “ubuntu” and the ssh key you configured in MAAS earlier:
All good? OK – release the node back to the cluster via the MAAS UI, and let’s move onto deploying OpenStack!
Deploying OpenStack
Download the bundle .zip file from https://jujucharms.com/openstack-base/50 to your client system and extract it:
ubuntu@jujuclient$ sudo apt install unzip -y
ubuntu@jujuclient$ unzip openstack-base.zip
The following files will be extracted:
- bundle.yaml: This file defines the modeling and placement of services across your OpenStack cluster
- neutron-ext-net, neutron-tenant-net: scripts to help configure your OpenStack networks
- novarc: script to setup your environment to use OpenStack
Next, install the Juju client from the snap store to your client system:
ubuntu@jujuclient$ sudo snap install juju --classic
Then, configure Juju to use your MAAS environment, as described here. After configuring Juju to use your MAAS cluster, run the following command Juju client system to instantiate a Juju controller node:
ubuntu@jujuclient$ juju bootstrap maas-cloud maas \
--bootstrap-constraints arch=arm64
Where “maas-cloud” is the cloud name you asssigned in the “Configure Juju” step. Juju will auto select a node from the MAAS cluster to be the Juju controller, and deploy the node. You can monitor this progress via the MAAS web interface and the console of the bootstrap node. Now, deploy the OpenStack bundle:
- Locate the bundle.yaml file from the openstack-base.zip tarball.\
- Open the bundle.yaml file in a text editor, and locate the data-port setting for the neutron-gateway service.
- Change the data-port setting as appropriate for the systems in your MAAS cluster. This should be name of the connected NIC interface on your systems that is not managed by MAAS (see the diagram in the “Network Layout” section of this post). For example, to use the second built-in interface on a HiSilicon D05 system, replace “br-ex:eno2” with “br-ex:enahisic2i1″. For more information, see the “Port Configuration” section in the neutron-gateway charm docs.
- Execute:
ubuntu@jujuclient$ juju deploy bundle.yaml
You can monitor the status of your deployment using the juju “status” command:
ubuntu@jujuclient$ juju status
Note: The deployment is complete once juju status reports all units, other than ntp, as “Unit is ready”. (The ntp charm has not yet been updated to report status, so ntp units will not report a “Unit is ready” message). Note: You can also view a graphical representation of the deployment and it’s status using the juju gui web interface:
ubuntu@jujuclient$ juju gui
GUI 2.10.2 for model "admin/default" is enabled at:
 https://10.228.66.11:17070/gui/u/admin/default
Your login credential is:
 username: admin
 password: d954cc41130218e590c62075de0851df
Troubleshooting Deployment If the neutron-gateway charm enters a “failed” state, it maybe because you have entered an invalid interface for the data-port config setting. You can change this setting after deploying the bundle using the juju set-config command, and asking the unit to retry:
ubuntu@jujuclient$ juju config neutron-gateway data-port=br-ex:<iface>
ubuntu@jujuclient$ juju resolved neutron-gateway/0
If the device name is not consistent between hosts, you can specify the same bridge multiple times with MAC addresses instead of interface names. The charm will loop through the list and configure the first matching interface. To do so, specify a list of macs using a space delimiter as seen in the example below:
ubuntu@jujuclient$ juju config neutron-gateway data-port=br-ex:<MAC> br-ex:<MAC> br-ex:<MAC> br-ex:<MAC>
ubuntu@jujuclient$ juju resolved neutron-gateway/0
Testing it Out
See the “Ensure it’s working” section of the following document to complete a sample configuration and launch a test instance: https://jujucharms.com/u/dannf/openstack-base (^ This is a fork of the main charm docs w/ some corrections pending merge). Finally, you can access the OpenStack web interface at: http://<ip of openstack-dashboard>/horizon To obtain the openstack-dashboard ip address, run:
ubuntu@jujuclient$ juju run --unit openstack-dashboard/0 'unit-get public-address'
Login as user ‘admin’ with password ‘openstack’ Many thanks to Sean Feole for helping draft this guide, and to Michael Reed & Ike Pan for testing it out 


