Your submission was sent successfully! Close

You have successfully unsubscribed! Close

Thank you for signing up for our newsletter!
In these regular emails you will find the latest updates about Ubuntu and upcoming events where you can meet our team.Close

How to build a highly available Kubernetes cluster with MicroK8s

1. Overview

In this tutorial, you’ll learn how to create a highly available Kubernetes cluster using the MicroK8s HA feature. Instead of using several machines or a public cloud to host the cluster, you’ll learn how to use Multipass as a basis for a local cloud.

What is Kubernetes?

Kubernetes clusters host containerised applications in a reliable and scalable way. Having DevOps in mind, Kubernetes makes maintenance tasks such as upgrades and security patching simple.

What is MicroK8s?

MicroK8s is a zero-ops, CNCF certified lightweight Kubernetes distribution for workstations, clusters, edge and IoT devices.

Packaged as a snap, it runs all Kubernetes services natively (i.e. no virtual machines) while packing the entire set of libraries and binaries needed along with the most popular Kubernetes add-ons. Installation is limited by how fast you can download a couple of hundred megabytes and the removal of MicroK8s leaves nothing behind.

What you’ll learn

  • How to install Multipass to run and manage virtual machines
  • How to deploy MicroK8s instances on virtual machines
  • How to join MicroK8s nodes in a single, highly-available, Kubernetes cluster

What you’ll need

  • A machine with Ubuntu, Windows or macOS with at least 8GB of RAM

2. Install Multipass

If you are using Windows or macOS, you can skip this step, as the MicroK8s Windows and macOS installers already install Multipass as part of the installation package.

Multipass is used to easily create a mini-cloud of VMs on your workstation. In this tutorial, we will run MicroK8s instances on Multipass VMs to create our Kubernetes cluster on a Linux workstation.

Multipass for Linux is published as a snap package, available on the Snap Store. Thanks to that it’s available for most major Linux distributions. Once you have snaps running on your distribution installing Multipass is as easy as:

snap install multipass

Launch virtual machines

Once you have Multipass installed on your machine, you can use it to spin up Ubuntu virtual machines. In this tutorial, we will create 3 virtual machines to host our MicroK8s nodes.

On your terminal type:

multipass launch -m 4Gb -n <vm-name>

If you do not specify a VM name using the -n argument, Multipass will automatically assign a random name to your VM. The -m argument assigns a specific amount of memory to your VM. Here, to ensure the VM gets enough memory to run your K8s cluster, we allocate 4Gb.

Use the shell prompts of your VMs

To login to your virtual machines and use their shell prompt, use:

multipass shell <vm-name>

Your multipass VMs are using the latest Ubuntu image. You can use these to install MicroK8s and create your Kubernetes cluster.


3. Install MicroK8s

On each one of your VMs run:

sudo snap install microk8s --classic

The installation can take up to a few minutes, depending on your hardware resources.

To install MicroK8s on other platforms (Windows, macOS, Raspberry Pi etc) please see the MicroK8s documentation.

MicroK8s is a snap and as such, it is frequently updated to each release of Kubernetes. To follow a specific upstream release series it’s possible to select a channel during installation. For example, to follow the v1.19 series:

sudo snap install microk8s --classic --channel=1.18/stable

To check the status of your MicroK8s node after the installation is finished you can use:

microk8s status --wait-ready

In case you get an insufficient permissions message, you need to use the following commands to add ‘ubuntu’ user to the microk8s sudoers group inside the VM:

sudo usermod -a -G microk8s ubuntu
sudo chown -f -R ubuntu ~/.kube

To validate the changes you can exit the VM’s shell and log in again.


4. Create a MicroK8s multi-node cluster

Now let’s focus on creating the Kubernetes cluster. On the initial node, run:

microk8s add-node

This command will give you the following output:

Join node with:
microk8s join ip-172-31-20-243:25000/DDOkUupkmaBezNnMheTBqFYHLWINGDbf

If the node you are adding is not reachable through the default interface 
you can use one of the following:
microk8s join 10.1.84.0:25000/DDOkUupkmaBezNnMheTBqFYHLWINGDbf
microk8s join 10.22.254.77:25000/DDOkUupkmaBezNnMheTBqFYHLWINGDbf

Copy the join command from the output and run it from the next MicroK8s node. It may take a few minutes to successfully join.

Repeat this process (generate a token, run it from the joining node) for the third node.

The same process should be repeated if you want to join additional nodes.


5. Deploy a sample containerised application

Let’s now create a microbot deployment with three pods via the kubectl cli. Run this on any of the control plane nodes:

microk8s kubectl create deployment microbot --image=dontrebootme/microbot:v1
microk8s kubectl scale deployment microbot --replicas=3

To expose our deployment we need to create a service:

microk8s kubectl expose deployment microbot --type=NodePort --port=80 --name=microbot-service

After a few minutes our cluster looks like this:

> microk8s kubectl get all --all-namespaces
NAMESPACE     NAME                                          READY   STATUS    RESTARTS   AGE                                                                                                                [0/594]
kube-system   pod/calico-kube-controllers-847c8c99d-mjgqn   1/1     Running   0          1m
kube-system   pod/calico-node-2x7t7                         1/1     Running   0          1m
kube-system   pod/calico-node-vkzg8                         1/1     Running   0          1m
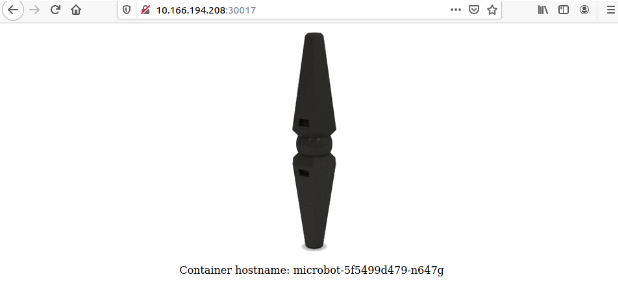
default       pod/microbot-5f5499d479-n647g                 1/1     Running   0          30s
default       pod/microbot-5f5499d479-x25lc                 1/1     Running   0          35s
default       pod/microbot-5f5499d479-xrbf2                 1/1     Running   0          40s   

NAMESPACE   NAME                       TYPE        CLUSTER-IP      EXTERNAL-IP   PORT(S)        AGE
default     service/kubernetes         ClusterIP   10.152.183.1    <none>        443/TCP        1m
default     service/microbot-service   NodePort    10.152.183.99   <none>        80:30017/TCP   42s

NAMESPACE     NAME                         DESIRED   CURRENT   READY   UP-TO-DATE   AVAILABLE   NODE SELECTOR            AGE
kube-system   daemonset.apps/calico-node   2         2         2       2            2           kubernetes.io/os=linux   1m

NAMESPACE     NAME                                      READY   UP-TO-DATE   AVAILABLE   AGE
kube-system   deployment.apps/calico-kube-controllers   1/1     1            1           1m
default       deployment.apps/microbot                  3/3     3            3           40s

NAMESPACE     NAME                                                DESIRED   CURRENT   READY   AGE
kube-system   replicaset.apps/calico-kube-controllers-847c8c99d   1         1         1       1m
default       replicaset.apps/microbot-5f5499d479                 3         3         3       40s

At the very top, we have the microbot pods, service/microbot-service is the second in the services list. Our service has a cluster IP through which we can access it. Notice, however, that our service is of type NodePort. This means that our deployment is also available on a port on the host machine; that port is randomly selected and in this case, it happens to be 30017.

Access the application from your browser

In order to access the microbot service from your local browser, you need to point it to the IP of one of your VMs and the port the service is exposed from.

Use the ip a command in one of your VMs to see its IP address:

>ip a

1: lo: <LOOPBACK,UP,LOWER_UP> mtu 65536 qdisc noqueue state UNKNOWN group default qlen 1000                                                                                                                        
    link/loopback 00:00:00:00:00:00 brd 00:00:00:00:00:00                                                                                                                             
    inet 127.0.0.1/8 scope host lo                                                                                                                                            
       valid_lft forever preferred_lft forever                                                                                                                                    
    inet6 ::1/128 scope host                                                                                                                                          
       valid_lft forever preferred_lft forever                                                                                                                                                                     
2: ens4: <BROADCAST,MULTICAST,UP,LOWER_UP> mtu 1500 qdisc fq_codel state UP group default qlen 1000                                                                                                                
    link/ether 52:54:00:c9:b1:2f brd ff:ff:ff:ff:ff:ff                                                                                                                             
    inet 10.166.194.208/24 brd 10.166.194.255 scope global ens4                                                                                                                                          
       valid_lft forever preferred_lft forever                                                                                                                                                                     
    inet6 fe80::5054:ff:fec9:b12f/64 scope link                                                                                                                                          
       valid_lft forever preferred_lft forever                                                                                                                                                                     

5: vxlan.calico: <BROADCAST,MULTICAST,UP,LOWER_UP> mtu 1410 qdisc noqueue state UNKNOWN group default                                                                                                              
    link/ether 66:ae:23:b9:4c:ca brd ff:ff:ff:ff:ff:ff                                                                                                                                                             
    inet 10.1.202.0/32 brd 10.1.202.0 scope global vxlan.calico                                                                                                                                        
       valid_lft forever preferred_lft forever                                                                                                                                                                     
    inet6 fe80::64ae:23ff:feb9:4cca/64 scope link                                                                                                                                          
       valid_lft forever preferred_lft forever

6: cali6d8cc5df688@if3: <BROADCAST,MULTICAST,UP,LOWER_UP> mtu 1440 qdisc noqueue state UP group default
    link/ether ee:ee:ee:ee:ee:ee brd ff:ff:ff:ff:ff:ff link-netns cni-f8c70512-4448-aa9d-4e8a-41d780c92f43
    inet6 fe80::ecee:eeff:feee:eeee/64 scope link
       valid_lft forever preferred_lft forever

9: cali6f43c081ad9@if3: <BROADCAST,MULTICAST,UP,LOWER_UP> mtu 1440 qdisc noqueue state UP group default
    link/ether ee:ee:ee:ee:ee:ee brd ff:ff:ff:ff:ff:ff link-netns cni-78561df6-7132-a1ba-9b60-30d1010d555a
    inet6 fe80::ecee:eeff:feee:eeee/64 scope link
       valid_lft forever preferred_lft forever

10: calic0bf7d8c9d3@if3: <BROADCAST,MULTICAST,UP,LOWER_UP> mtu 1440 qdisc noqueue state UP group default
    link/ether ee:ee:ee:ee:ee:ee brd ff:ff:ff:ff:ff:ff link-netns cni-61873c9a-7b3c-e0ac-ab6a-bd5ea85a0b6c
    inet6 fe80::ecee:eeff:feee:eeee/64 scope link
       valid_lft forever preferred_lft forever

In our case, the ens4 is the designated network interface with the IP of 10.166.194.208

We can now open a browser, point it to 10.166.194.208:30017 and marvel at our microbot!

Image%20Pasted%20at%202020-9-29%2014-13


6. Wrap-up

Congratulations, you now have a highly-available multi-node Kubernetes to orchestrate your containers.

You can now stop all MicroK8s services:

microk8s stop

or reset your cluster configuration with:

microk8s reset

Where to go from here?