
Part 5: Create an Ubuntu Core image for the TurtleBot3
When developing a robot, one might want to have an Ubuntu image ready to be flashed on a robot. With Ubuntu Core, developers can prepare an image embedding all the software necessary for a robot as well as configurations, so the robot is ready to be used from the first boot without manual intervention.
This tutorial will guide you through the steps required to create your own Ubuntu Core image for a TurtleBot3, with all the necessary snaps, and install it on a Raspberry Pi 4.
Requirements
For this tutorial, you will need:
A developer account, and be logged in with snapcraft
Some basic snap/snapcraft knowledge
A TurtleBot3 with a RaspberryPi 4
An additional screen or, alternatively, a serial adaptor.
The goal
For this tutorial, our goal will be to create an Ubuntu Core image that is ready to be installed and used on a TurtleBot3 robot equipped with a Raspberry Pi 4.
The image will include all the TurtleBot3c snaps that we prepared in the Tutorial part 4: Building ROS snaps with content sharing:
Turtlebot3c-bringup: The core components for the TurtleBot3
Turtlebot3c-nav: The navigation components for the TurtleBot3
Turtlebot3c-teleop: The teleoperation components of the Turtlebot3
Additionally, for convenience, the robot should create its own hotspot so we can connect to the robot and teleoperate it from our laptop. For that matter, we will also embed:
Wifi-hotspot-config: Configure the network manager for the hotspot
Network-manager: The network manager
Avahi: The Avahi daemon so we can ping by hostname and not IP address.
With all these snaps installed and configured in our image, after booting the SD card in the Raspberry Pi, we will be able to teleoperate the robot from a computer connected to the hotspot.
If you are looking for a more generic tutorial about Ubuntu Core image creation, and additional information, please visit: ubuntu.com/core/docs/build-an-image.
Create the assertion model
When building an Ubuntu Core image, the very first step is to write an assertion model.
The model is a recipe that describes the components that comprise a complete image. An assertion is provided as JSON in a text file.
See more: Assertion model
The model contains:
Identification information, such as the developer-id and model name.
Which essential snaps make up the device system.
Other required or optional snaps that implement the device functionalities.
In our case, we will build a Raspberry Pi 4 image, and we will pick core20 as the version of the Ubuntu Core image. While the Ubuntu Core version can be chosen independently of the base version of the snaps, it will still include the corresponding version of the base snap. In this example, all of our snaps are using core20 since we are using ROS Noetic. We thus pick the corresponding Ubuntu Core image, core20, to spare the installation of a different core snap.
Metadata
First, we get the reference model for the Raspberry Pi 4. Provided as a reference, it will serve as a good starting point for our own model:
wget -O turtlebot3c-model.json https://raw.githubusercontent.com/snapcore/models/master/ubuntu-core-20-pi-arm64.json
Open the file turtlebot3c-model.json and change the “model” field with the name turtlebot3c-pi-arm64:
-    "model": "ubuntu-core-20-pi-arm64",
+    "model": "turtlebot3c-pi-arm64",
In the same file, change the authority and brand-id with your own ID. It can be retrieved with:
snapcraft whoami
List of snaps
From the snaps already listed in the model, we leave the Raspberry Pi gadget, pi-kernel, snapd and core20 snaps.
When adding snaps to the model, an ID is requested. This is the unique ID provided by the Snap Store. We use the command snap info to get ID:
$ snap info core20
name:   core20
summary:   Runtime environment based on Ubuntu 20.04
publisher: Canonical✓
store-url: https://snapcraft.io/core20
contact:   https://github.com/snapcore/core20/issues
license:   unset
description: |
  The base snap based on the Ubuntu 20.04 release.
type:      base
snap-id:   DLqre5XGLbDqg9jPtiAhRRjDuPVa5X1q
tracking:  latest/stable
[...]
Here, the snap ID is DLqre5XGLbDqg9jPtiAhRRjDuPVa5X1q.
TurtleBot3c snaps
Let’s add the TurtleBot3c snaps to our turtlebot3c-model.json:
    {
    "name": "ros-noetic-robot",
    "type": "app",
    "default-channel": "latest/stable",
    "id": "hRIlEoo1gAoRqfWCrTmdNeioKT1DwQrn"
    },
   {
   "name":"turtlebot3c-bringup",
   "type":"app",
   "default-channel":"latest/beta",
   "id":"9QxPQq7N15yTrRVuy8s4NFCWmkZRjtOa"
   },
   {
   "name":"turtlebot3c-nav",
   "type":"app",
   "default-channel":"latest/beta",
   "id":"LJzR5xevdtU54wLeciVWXdhlKy1L4TrX"
   },
   {
   "name":"turtlebot3c-teleop",
   "type":"app",
   "default-channel":"latest/beta",
   "id":"m37jVvixxcn5YVD1t4wxfBKgx6nX4esy"
   }
Note that we’ve also added the ros-noetic-robot snap. We need it since we are using the TurtleBot3c ROS snap content-sharing approach that depends on ros-noetic-robot to provide the ROS libraries.
Networking snaps
Since we want the TurtleBot3 to create a hotspot, we will need the network-manager snap as well as our wifi-hotspot-config snap that will talk to the network-manager to create the hotspot on boot.
Additionally, for convenience, we also add avahi. This way, we will be able to ping the robot by hostname and not have to look for its IP address.
We add the networking snaps to the turtlebot3c-model.json:
{ "name": "network-manager",
  "type": "app",
  "default-channel": "20/stable",
  "id": "RmBXKl6HO6YOC2DE4G2q1JzWImC04EUy"
},
{ "name": "wifi-hotspot-config",
  "type": "app",
  "default-channel": "latest/beta",
  "id": "9s6xjXubw4a2yA0TE1aIyK90kewEzhYf"
},
{ "name": "avahi",
  "type": "app",
"default-channel": "latest/stable"
  "id": "dVK2PZeOLKA7vf1WPCap9F8luxTk9Oll"
}
The model now contains all the TurtleBot3c snaps as well as all the networking snaps. With all the applications that we need listed in the model, our model is ready.
Sign the model
To certify our model and modify it later on, we need to sign it.
This ensures the model cannot be altered without the key, and also links the created image to both the signed version of the model and an Ubuntu One account.
See more: Sign a model assertion
First, we check whether we have a key or not:
snapcraft list-keys
If not, we generate one:
snapcraft create-key turtlebot3c-key
Then we register it to the Snap Store with the details of our Ubuntu One account:
snapcraft register-key turtlebot3c-key
The key should now appear when entering:
$ snapcraft list-keys

The following keys are available on this system:
    Name              SHA3-384 fingerprint
*   turtlebot3c-key   XXXXXXXXXXXXXXXXXXXXXXXXXXXXXXX
With the key ready, we update the timestamp entry in the turtlebot3c-model.json. To generate a valid timestamp at the present moment, use the command:
date -Iseconds --utc
Note that we generated the timestamp after creating the key which is mandatory.
And report the change in the turtlebot3c-model.json:
-"timestamp": "2020-03-31T12:00:00.0Z",
+"timestamp": "2024-08-06T12:22:26+00:00",
We can now sign the model with our key turtlebot3c-key:
snap sign -k turtlebot3c-key turtlebot3c-model.json > turtlebot3c.model
We now have our signed model: turtlebot3c.model that we generated from our model turtlebot3c-model.json signed with our private turtlebot3c-key.
Create our gadget snap
The gadget snap is responsible for defining and configuring system properties specific to our device.
The gadget content can define the layout of the volumes of the device storage, default configuration options for snaps or even interface connections.
Thus, we will customise snap parameters as well as snap interface connections in our gadget snap for the TurtleBot3c snaps.
Get the template
Let us retrieve the template of the pi-gadget snap to kickstart our own:
git clone https://github.com/snapcore/pi-gadget.git -b 20-arm64
We picked the branch 20-arm64 to get the core20 version.
In the snapcraft.yaml of the pi-gadget snap that we’ve just cloned, change the name to “turtlebot3-pi”:
-name: pi
+name: turtlebot3c-pi
Note that at the end of the snapcraft.yaml, all the slots available are declared (serial, spi, i2c, etc.). For security consideration, we should remove the one that we don’t need. However, we leave this as an exercise to the reader.
We can now proceed with the gadget connections customisation.
Connections
In our snaps, some plugs are auto-connect. For those who are not, we manually connect them in the gadget snap.
Similarly to the model, we must specify the snaps by their ID.
Append the following connections at the end of the gadget.yaml file to connect the various interfaces.
volumes:
  [...]
+connections:
+  # turtlebot3c-bringup
+  - plug: 9QxPQq7N15yTrRVuy8s4NFCWmkZRjtOa:raw-usb

+  # turtlebot3c-teleop
+  - plug: m37jVvixxcn5YVD1t4wxfBKgx6nX4esy:joystick

+  # wifi-hotspot-config
+  - plug: 9s6xjXubw4a2yA0TE1aIyK90kewEzhYf:network-manager
+  slot: RmBXKl6HO6YOC2DE4G2q1JzWImC04EUy:service
Doing so, all the interfaces of our snap stack are automatically plugged for this specific Ubuntu Core image.
Configurations
The WiFi hotspot snap requires some configurations. More specifically, we want to configure a custom SSID and password, as well as the WiFi interface.
Similarly, we refer to the snap by their unique ID.
In the gadget.yaml, we configure the hotspot with the SSID “turtlebot3c” and the password “turtlebot3c”:
connections:
  [...]
+defaults:
+  9s6xjXubw4a2yA0TE1aIyK90kewEzhYf:
+    ssid: "turtlebot3c"
+    password: "turtlebot3c"
+    wifi-interface: "wlan0"
With this, the wifi-hotspot-config snap will create a hotspot called “turtlebot3c” so we can connect to it.
Build the gadget snap
Building a gadget snap is no different from any other snap.
We build the snap with snapcraft:
snapcraft
This gadget snap can be built for ARM64 on AMD64, so you can call it on your AMD64 host.
We now have our gadget snap: turtlebot3c-pi_20-1_arm64.snap. Let’s integrate it in our model!
In the turtlebot3-model.json, replace the previous gadget snap with our custom one:
-    {
-        "name": "pi",
-        "type": "gadget",
-        "default-channel": "20/stable",
-        "id": "YbGa9O3dAXl88YLI6Y1bGG74pwBxZyKg"
-    },
+    {
+        "name": "turtlebot3c-pi",
+        "type": "gadget"
+    },
Here we don’t define the id since we are providing the gadget snap locally and not from the Snap Store.
Additionally, because we use a local gadget snap that is unsigned, we can only mark the grade in the turtlebot3c-model.yaml as “dangerous”:
-grade: "strict"
+grade: "dangerous"
Since we modified the model, let’s sign it again:
snap sign -k turtlebot3c-key turtlebot3c-model.json > turtlebot3c.model
The Ubuntu Core model is now fully customised for the TurtleBot3c.
As we see in the following diagram, we have in the image the basic snapd, turltebot3c-pi and pi-kernel snaps. Additionally, we have the network-manager, avahi and wifi-hotspot-config snaps to set up and manage the network. Finally, we have the ros-noetic-robot snap providing the ROS libraries to our turtlebot3c-bringup, turtlebot3c-teleop and turtlebot3c-nav snaps.

Generating the image
To generate the image, we use the ubuntu-image tool. It generates an image ready to be written on an SD card from the model that we prepared.
Install the tool as a snap:
snap install ubuntu-image
In our case, we provide the turtlebot3c.model that we signed as well as our local gadget snap:
ubuntu-image snap turtlebot3c.model --snap ./pi-gadget/turtlebot3c-pi_24-1_arm64.snap
This generates the pi.img file. The image file already contains all the snaps we specified in our model, as well as the configurations and connections from the gadget snap.
Write the image
To flash the image on the SD card, we use rpi-imager which is conveniently distributed as a snap.
To install it:
snap install rpi-imager
Next, insert an SD card in your computer and start the rpi-imager.
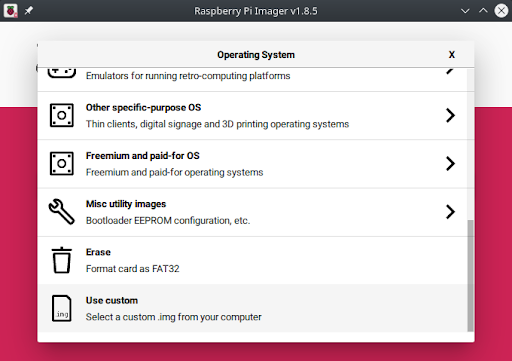
We choose raspberry-pi 4 as the device. For the OS, go down the list and select “use custom”:
Then select the pi.img file we’ve just created.
In the “choose storage”, select your SD card.
Select no when asked if you want to apply custom OS settings, and yes when asked to clear the SD card.
This writing can take some time, and the rpi-imager will let you know once your SD card is ready.
First boot
Once the SD card is ready, we can insert it in the Raspberry Pi 4.
Ubuntu Core does not ship with a user by default and since we didn’t create one explicitly, we won’t be able to interact with the OS by plugging a screen and a keyboard, but we can still do some monitoring.
Monitoring of the first boot
In case we still want to monitor the logs and what’s happening during the boot, we can connect a screen.
We can also connect a serial to USB adaptors for monitoring purposes.
To do so, connect the ground, Rx and Tx from your adaptor respectively to the pins 6, 8 and 10 of the Raspberry pi.
We use picocom to monitor the serial, we can install it with:
apt install picocom
You can now monitor the serial port with:
picocom /dev/ttyUSB0 -b 115200
Connect to the robot
The first boot creates the filesystem as well as decompresses the snaps and configures them. Meaning that the first boot can take up to 2 minutes.
Once finished, we can find the WiFi hotspot “turtlebot3c” available and connect to it with the password “turtlebot3c”.
Make sure to have avahi-daemon installed on your host machine and once connected to the WiFi hotspot, we can ping our robot with the command:
ping turtlebot3c.local
The TurtleBot3 is now ready to operate!
Teleoperate the robot
Now that we are connected to the robot, we can teleoperate it from our computer over the network.
First, we need to install turtlebot3c-teleop on our computer.
sudo snap install turtlebot3c-teleop
Make sure to disable the core application, since it’s already running on the robot.
sudo snap stop --disable turtlebot3c-teleop
We make our ROS_MASTER_URI point to the robot with:
export ROS_MASTER_URI=”http://turtlebot3c.local:11311”
after what, we can use the keyboard to teleoperate our robot with:
turtlebot3c-teleop.key
We have now tested our custom Ubuntu Core image with success.
Conclusion
When we booted the robot the first time no manual intervention was necessary, everything was planned in advance by the means of the gadget snap and the model. We have seen not only how to pre-install our application on an Ubuntu Core image, but also how to customise the image and our application for a specific use case. Ubuntu Core is meant for devices in production.
Thanks to the security and sandboxing features, Ubuntu Core is not only lightweight and customised but also secured, making it ready for an industrial application. Combined with landscape, it offers the perfect solution to deploy robot software at scale.
More generic documentation about Ubuntu Core can be found on ubuntu.com/core/docs.