Configure a snap: pull a configuration from a server
When a robotics application is snapped, one might want to use it on multiple different robots.
Reusing the same snap means that we must be able to configure the snap to the specificity of a robot once installed on it.
We present in this guide the steps to host a configuration on a server and use it for our snap.
Our snap will get its configuration not from the snapped package but from a web server. This allows us to use the same snap on multiple devices with different configurations hosted remotely, as well as updating the configuration without having to update the snap itself.
For this how-to-guide, we use the example ubuntu-robotics/snap_configuration.
The repository consists of the snapcraft.yaml file from which the snap is built, as well as a launcher script.
The repository contains a standard snap package providing the key_teleop application from the teleop_tool ROS 2 package. The goal here is to be able to configure the application without having to update the snap. The key_teleop node can be configured for its forward_rate, backward_rate and rotational_rate parameters. They are the parameters we will be configuring from the server.
Requirements
This how-to-guide is assuming that we are familiar with robotics snaps. Please refer to our tutorials to learn more about robotics snaps.
Additionally, this how-to-guide will require a GitHub account and the associated ssh key setup (this is necessary to follow this how-to-guide but not for the approach).
An up and running Ubuntu (minimum 20.04) with snapcraft installed is also required.
Download the initial configuration
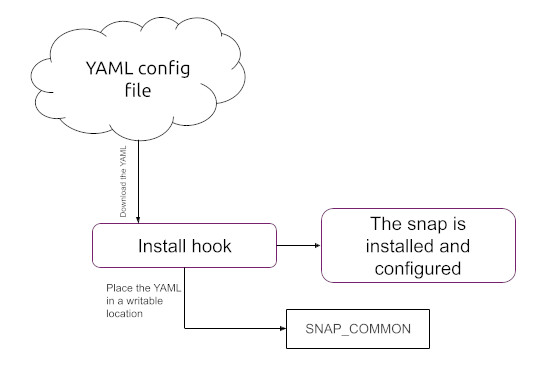
To get the initial configuration, we will use the snap install hook. The following diagram shows how the install hook will pull the configuration from a server and place it in $SNAP_COMMON. Once this is done, our snap will be installed and configured.

Host a configuration file
Since we are retrieving the configuration from a remote location, it has to be hosted somewhere. While any file server would do, we will use GitHub as a simple and easy solution.
In order to reproduce the how-to-guide, we should fork the ubuntu-robotics/snap_configuration.
We will place the configuration file in the same git repository as the snap for the sake of simplicity.
First, we clone our fork:
git clone git@github.com:YOUR_GH_USERNAME/snap_configuration.git
At the root of our git repository, we will create a file called key_teleop.yaml with the following ROS 2 configuration content:
key_teleop:
  ros__parameters:
    forward_rate : 1.234 # our custom value
This configuration changed the default forward_rate to 1.234.
Now we can add, commit and push this change to our forked repository:
git add key_teleop.yaml
git commit -m "add configuration"
git push
Our configuration file is now available online. By looking for it on GitHub and selecting the “raw” view, we will get the URL of the configuration file to download later.
With the original repository, the URL is:
Download and place the file
Now that we have a configuration file available online, we can write a script – that will be invoked by the install hook – to download it and place it appropriately in our snap. For instance, in $SNAP_COMMON. Since the install hook runs as root, we cannot use any user-specific snap writable environment. The $SNAP_COMMON directory is the same for root or any user and will be read-accessible from any user.
First, let us write the script to download the configuration and place it.
We create the file snap/local/download_config.bash with the following content:
#!/usr/bin/bash

URL="https://raw.githubusercontent.com/ubuntu-robotics/snap_configuration/howto/pull_configuration_from_a_server/key_teleop.yaml"
curl $URL -o $SNAP_COMMON/up-to-date-config.yaml
And make it executable:
chmod +x snap/local/download_config.bash
Curl now being a dependency, we must make it available at runtime in our snap. Let’s modify the snapcraft.yaml:
local-files:
  plugin: dump
  source: snap/local/
+ stage-packages: [curl]
  organize:
    '*.bash': bin/
The download_config script will be called from the install hook.
Let’s create the hook:
mkdir snap/hooks
Then, we create the file snap/hooks/install with the following content:
#!/usr/bin/bash

$SNAP/bin/download_config.bash
And make it executable:
chmod +x snap/hooks/install
Finally, we must grant network access to our hooks so it can reach our server. We can do so in the snapcraft.yaml:
 grade: devel
 confinement: strict
+hooks:
+  install:
+    plugs: [network]
Use the file
We are just missing a small detail: using the configuration file.
We can use the downloaded configuration file by modifying the launcher snap/local/teleop_launcher.bash:
-ros2 run key_teleop key_teleop
+ros2 run key_teleop key_teleop --ros-args --params-file $SNAP_COMMON/up-to-date-config.yaml
We can now build the snap and install it!
snapcraft
sudo snap install my-ros2-teleop-test_*.snap --dangerous
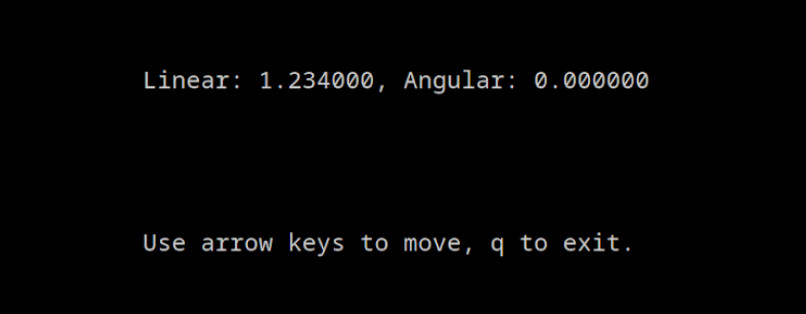
When launching our application with the command my-ros2-teleop-test we can see that when using the “up” arrow, our custom value 1.234 is showing!

Keeping the configuration up to date
Now that our snap is pulling its configuration on install, let’s keep the configuration up to date over time.
Automatic configuration update
Since we already have our script to download and place a configuration from a server, we can reuse it to call it on a regular basis to keep our configuration up to date.
To do so, we add a daemon to our snap called by a timer. The daemon will be called every day at midnight so that it executes the download_config.bash to update our configuration. The timer syntax is described in the documentation.
We must change the snapcraft.yaml as following:
apps:
+ auto-update-config:
+   command: bin/download_config.bash
+   daemon: simple
+   timer: "00:00" # every day
+   plugs: [network]
Let’s build and install our updated snap:
snapcraft
sudo snap install my-ros2-teleop-test_*.snap --dangerous
Note that this time, the install hook won’t be called. Indeed, the snap is already installed and this only updates it.
To verify that our auto update works properly, we can change the configuration file on our server.
Let’s modify our configuration file key_teleop.yaml:
forward_rate : 1.234
+backward_rate: 4.321
And upload it:
git add key_teleop.yaml
git commit -m "update configuration"
git push
Since we won’t wait until midnight to verify that our auto update works, we can trigger the daemon manually with the following command:
sudo snap run my-ros2-teleop-test.auto-update-config
And test it:
my-ros2-teleop-test
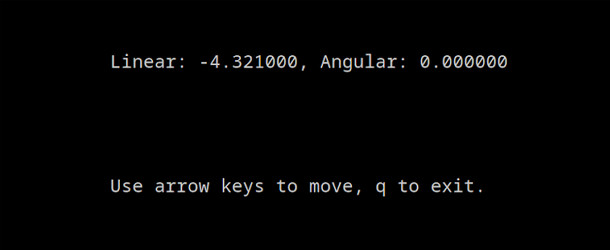
By pressing the “bottom” arrow key on the keyboard, we can see that the latest configuration was used!

⚠️ Caution: Mind that GitHub pages are cached for 5 minutes, we thus have to wait 5 minutes before being able to pull the new configuration. This is a GitHub limitation.
Our snap is not only retrieving a configuration from a server on install, but also getting the configuration updated automatically!
One may notice that the configuration will be the same for every snap installed. Or that the application won’t even work if the configuration file download fails. Indeed, the configuration file’s URL is hard-coded and no default file is provided. We are providing here a basic example, and the reader can customize it to their own needs or limitations. Contact us if you want more help on your robotics application!
We can find the completed example of this how-to-guide on the branch how-to/pull_configuration_from_a_server of the repository.
